Yesterday I showed you how I made the layered locket itself for 'The Royal Secret Keeper'. The adhesive has had time to cure and today I finished the necklace. It turned out rather well, if I do say so myself.
Before beginning the necklace portion of the project I touched up the patina on the locket itself and gave it a good cleaning before sealing it with Renaissance Wax.
On to the necklace!
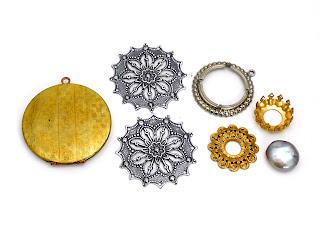
I made a custom connector from raw brass filigree to harmonize with the filigree on the locket. I cut the filigree in half with my Joyce Chen Unlimited Scissors, which are indispensable for cutting filigree and light sheet metal, as they give a lot of control and cut through like butter. Be careful, they cut flesh like it wasn't even there; ask me how I know.
 |
After cutting apart the filigree I smoothed the cut edges with a grinding tip on my flex shaft, then went over the filigree with the brass brush. I do appreciate the quick change hand piece, because I change tools on my flex shaft constantly.
I then drilled a hanging hole at the bottom and riveted a pronged pearl setting to the front of the connector and added a matching cultured freshwater pearl.
Now it's time to construct the necklace. I wanted this to be a rich, harmonious melding of golden to brown, with silver as an accent color. Here's my materials list for the necklace:
- (8) 11mm x 9mm silver peacock cultured freshwater pearls
- (6) 6mm raw brass filigree beads
- (16) 5mm brass ox plated daisy spacer beads
- (16) 3mm raw brass round beads
- (12) 4mm silver ox plated daisy spacer beads
- (12) 2.5mm silver plated brass beads
- (11) 9mm raw brass rope-twist pattern heavy jump rings
- (2) 16mm raw brass rope-twist pattern heavy jump rings
- (24) 9mm x 6mm raw brass links from a chain
- (1) 13mm raw brass smooth heavy jump ring
- 22 gauge NuGold brass wire
- ... and a hand forged hook made from 12-gauge NuGold brass wire.
The patina products are the same as I used yesterday on the locket itself.
First I needed to spruce up my filigree beads; they are vintage and were dull and grungy. I strung them onto long headpins and made a loop at the end so they won't fall off; when I hit them with the brass brush on my flex shaft they spun on the axis like they were on a lathe and were brushed clean in a jiffy! Then I washed them, dipped them to remove the old patina and re-patina'd and brush-polished them again. The difference was really much more striking than the photo shows.
If you take one thing away from my experience, it's the trick of stringing the beads on a headpin and gang-polishing them. It's probably been done before, but I hadn't heard of it before and I nearly threw my shoulder out from patting myself on the back.
I gang-polished the brass jump rings in much the same way - threaded them on a heavy wire loop and laid into 'em with that brass brush disc.
This is really a simple pattern using two styles of wire wrapped beads - genuine cultured pearls and brass filigree. I did linked sets of three, interspersed with a wrapped pearl on its own.
The pattern goes 'link of three' - oblong brass link, round brass link, oblong link - wrapped pearl - oblong brass link, round brass link, oblong link - 'link of three' and repeats... EXCEPT! Yes, I had to make it tricky. I wanted the hook in the front, on the left side, which meant that I needed to play with the rings so the two sides would be balanced. I'll spare you the blow by blow, because I used some unladylike language before I got it sorted.
Once I got the tricky bit figured out it was a simple job to wrap the rest of the links and assemble the necklace. All it needs now it a final wash and sealing with Renaissance Wax, which I will do tomorrow.
So without further ado, I present 'The Royal Secret Keeper'. It's just under 26 inches long and I love it! I may keep it, if only because it would have to be a relatively expensive piece due to the time and materials. I'll crunch numbers tomorrow.
So, what do you think? I welcome input - how could I have made this tutorial better? What kind of blog posts and/or tutorials are you interested in? Please leave suggestions in the comments (or through Facebook) and have a wonderful day!
~R.
P.S. I hope you are inspired to use these techniques to create your own original designs!


